
Integrate WordPress with Salesforce Pardot Using Single Sign-On (SSO)
Integrating WordPress with Salesforce’s Account Engagement (formerly Pardot) using Single Sign-On (SSO) simplifies user management and enhanced security. Follow these steps to set up the integration.
Step 1: Download and Install the Account Engagement Plugin
- Log into WordPress:
- Navigate to the WordPress admin dashboard.
- Go to the Plugins section.
- Install the Plugin:
- Click on Add New.
- Search for Account Engagement.
- Locate the correct plugin (it should look like the screenshot below) and click Install Now.
- After installation, navigate to the Plugins tab, find the Account Engagement plugin, and click Activate.
Step 2: Configure Your Salesforce Connected App
- Log into Salesforce:
- Open a new tab and log into your Salesforce account.
- Navigate to Setup.
- Create a Connected App:
- In the Quick Find box, type App Manager.
- Click on New Connected App in the top right corner.
- Fill in the basic information section.
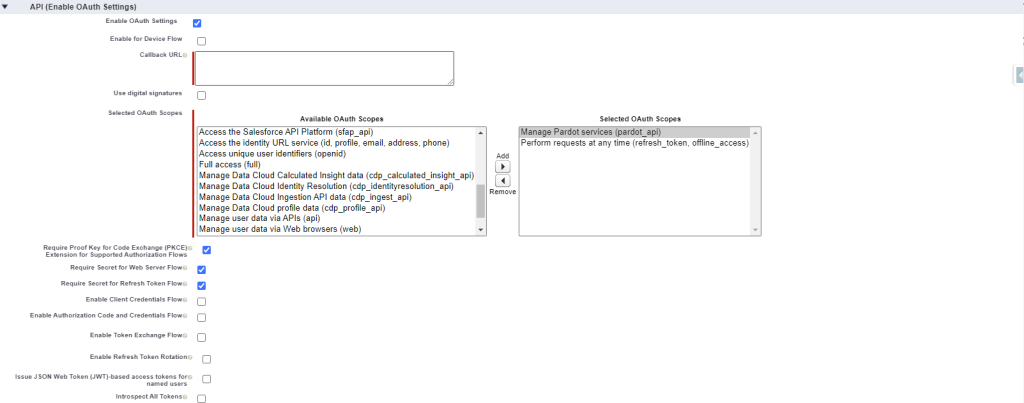
- Set Up OAuth Settings:
- Check Enable OAuth Settings.
- Enter the callback URL provided by the Account Engagement plugin. This URL typically looks like: https://[YourWordPressDomain]/wp-admin/options-general.php?page=pardot.
- Under Selected OAuth Scopes, select:
- Manage Pardot Services (pardot_api)
- Perform requests at any time (refresh_token, offline_access)
- Save the Connected App:
- Check the box for Require Secret for Web Server Flow.
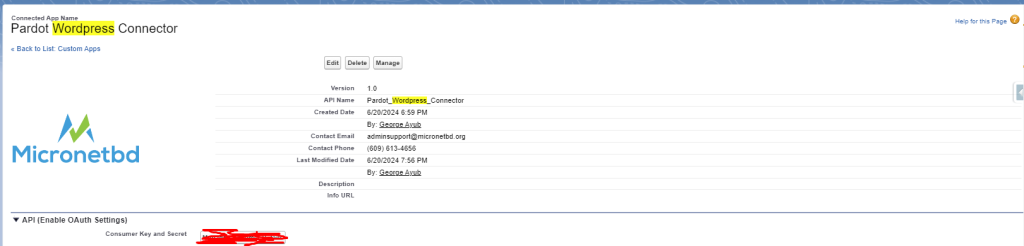
- Click Save. The consumer key and secret will be generated and displayed.
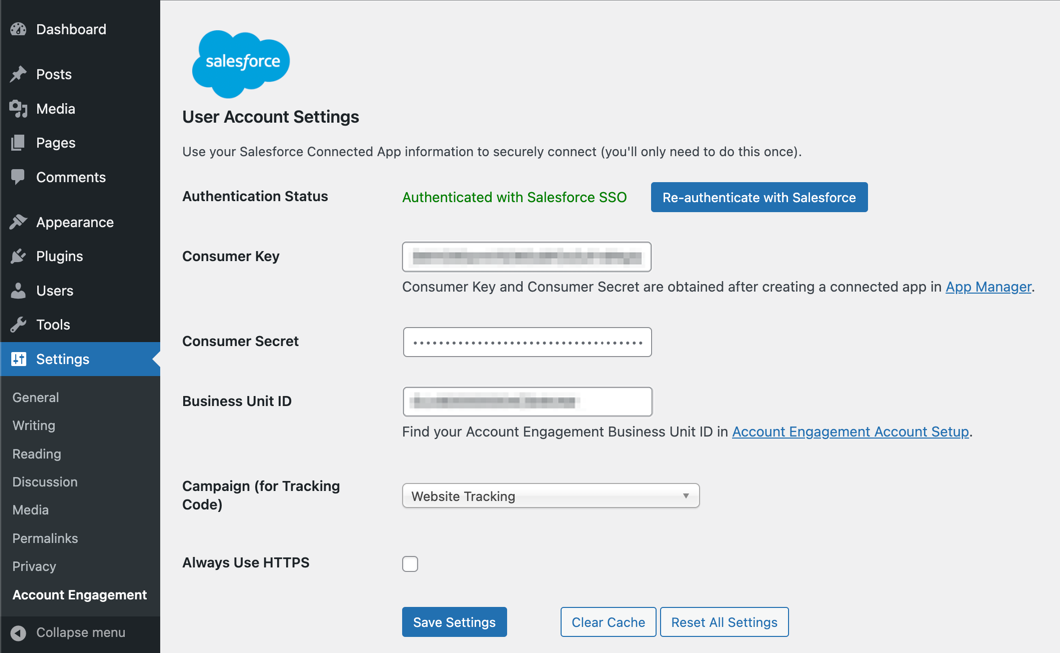
Step 3: Configure the Account Engagement Plugin in WordPress
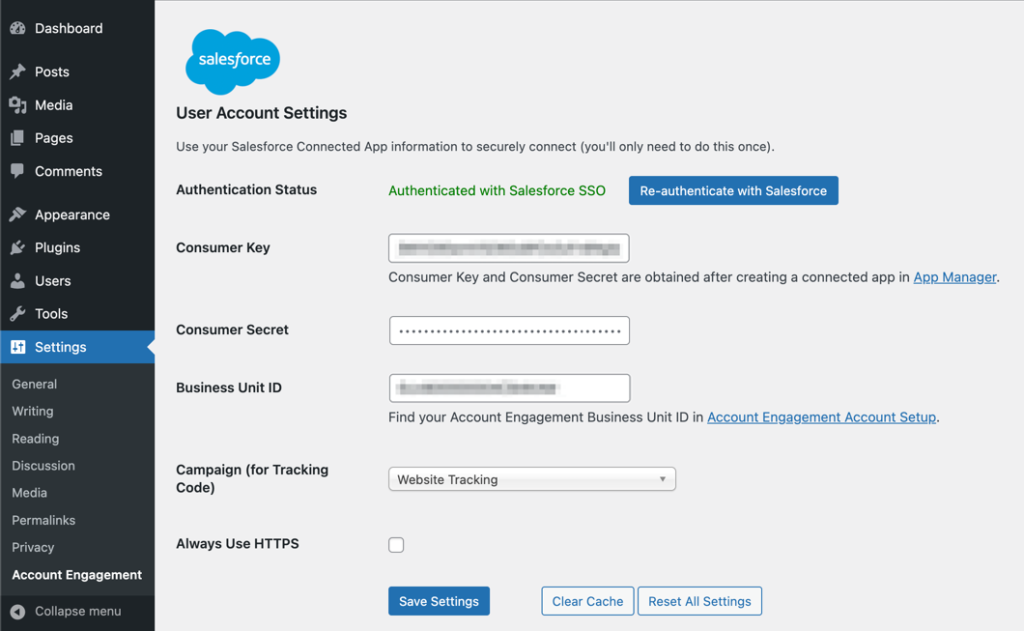
1. Open Plugin Settings:
- Go back to the WordPress tab with the Account Engagement plugin settings open.
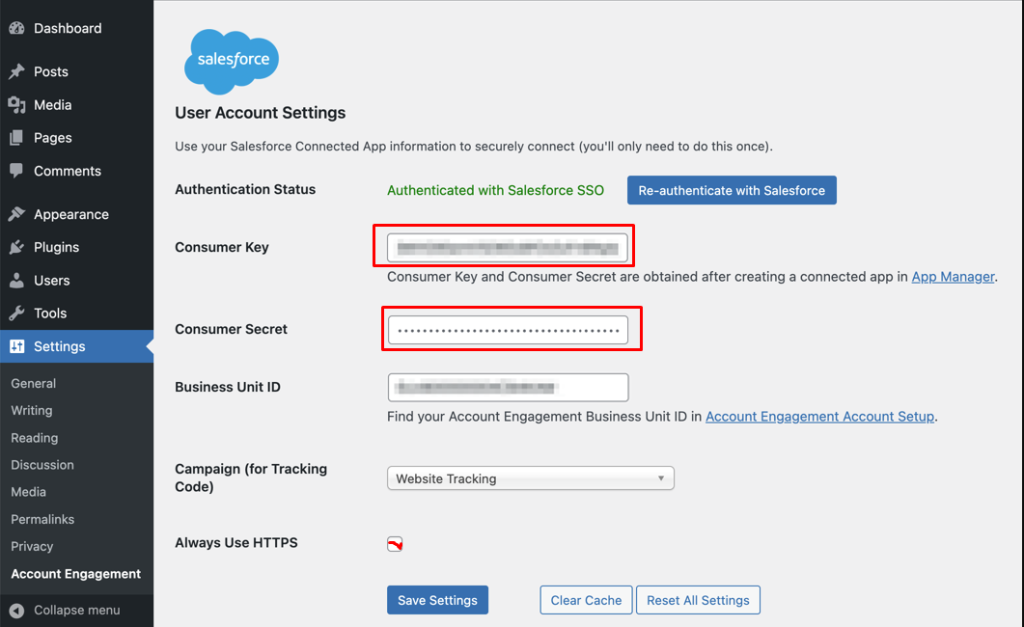
- Change the authentication type to SSO.
2. Enter Salesforce Credentials:
- Copy the consumer key and customer secret from Salesforce.
- Paste these values into the appropriate fields in the Account Engagement plugin settings.
3. Find Your Business Unit ID:
- In Salesforce, navigate to Setup, then search for Account Engagement.
- Go to Business Unit Setup and locate your Business Unit ID.
- Enter this ID into the Account Engagement plugin settings in WordPress.

4. Authenticate with Salesforce:
- Click Authenticate with Salesforce.
- If prompted, log into your Salesforce account to complete the authentication process.
- Once authenticated, the status should indicate Authenticated with Salesforce SSO.
5. Select Campaign for Tracking:
- Choose the campaign for tracking code within the plugin settings.
- Click Save.
Step 4: Embed Forms and Dynamic Content
1. Add Content to Your Site:
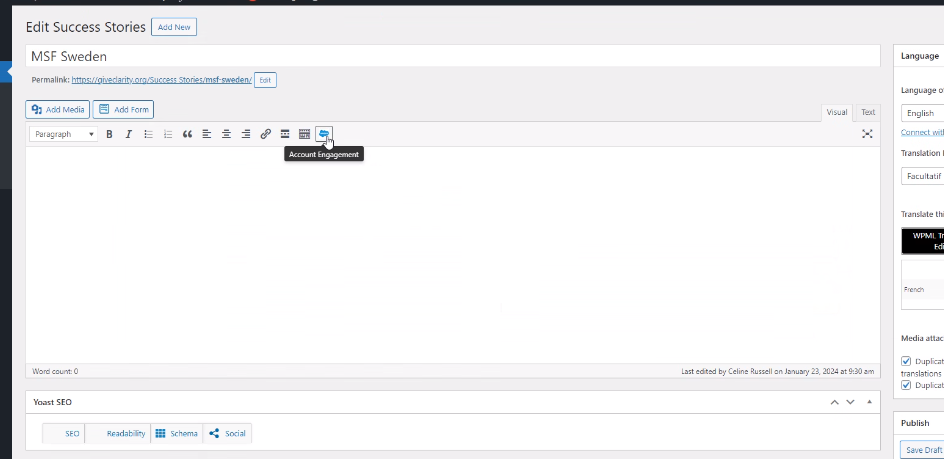
- After successful setup, a blue Salesforce button will be added to your WordPress text editor.
- Click this button to embed forms and dynamic content from your Account Engagement instance.
2. Select Content:
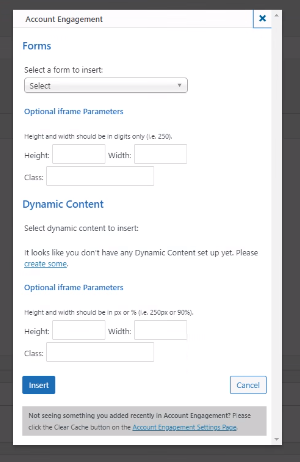
- A window will appear, allowing you to choose either a form or dynamic content to embed.
3. Troubleshooting:
- If content does not appear as expected, go back to the plugin settings and clear the cache.
Updated September 2026.
Three ways to connect WordPress and Account Engagement (Pardot)
The single sign-on setup above is the advanced route. Most sites need one of these three first, and the choice depends on who owns the forms and how much of the visitor’s journey you want in Salesforce.
1. The official Account Engagement plugin
Salesforce’s own WordPress plugin (still listed as “Pardot” in the plugin directory) adds a settings page, a shortcode and a block for embedding Account Engagement forms and dynamic content, and drops the tracking code on every page. It is the fastest route when marketing owns the forms in Account Engagement and WordPress only needs to display them. Connect it with a Salesforce connected app as described in Step 2, not with a username and password.
2. Form handlers with your existing WordPress forms
If the site already runs Gravity Forms, WPForms or Contact Form 7, keep them and post their submissions to an Account Engagement form handler. The form handler is a URL that accepts the fields you map; the WordPress form posts to it on submit, and the prospect is created or updated in Account Engagement with the campaign and source you set on the handler. You keep your styling, spam protection and conditional logic, and marketing still gets the prospect record. The trade-off is that field names must match exactly and a change on either side breaks the mapping silently, so test every form after a plugin update.
3. Embedding the Account Engagement form directly
Account Engagement forms can be embedded as an iframe. It is the least work and the least flexible: styling is done in Account Engagement’s layout templates, the iframe does not inherit the WordPress theme, and consent banners have to be handled on both sides. Use it for a single landing page, not for a site full of forms.
Tracking code, consent and first-party cookies
Whichever route you choose, the tracking code is what turns anonymous visits into a prospect’s activity history once they fill in a form. Two things trip sites up in 2026: the tracker must be configured for first-party tracking on your own tracker domain (a CNAME such as go.yourdomain.com), and it must respect your consent banner, so the script should only fire after the visitor accepts marketing cookies. If the plugin loads the tracker unconditionally, load it through your tag manager instead and gate it on consent.
Mistakes we fix most often
- Forms connected with a user’s personal login rather than a connected app, so the integration breaks when that person leaves.
- Form handler field names that drifted after a form rebuild, so submissions land in Account Engagement with empty fields.
- Completion actions (assign to user, add to list, notify) set on the Account Engagement form but not on the form handler, so leads arrive and nobody is told.
- The tracking code loaded twice, once by the plugin and once by the tag manager, which inflates visits and confuses scoring.
- No campaign or source on the handler, so every lead reports as “website” and marketing cannot see which page produced it.
Need general Salesforce sync, not just Pardot?
Account Engagement is the right answer for marketing forms and email. If you need WordPress to create leads or cases in Salesforce itself, sync WooCommerce orders, or give customers a login backed by Salesforce, read Salesforce WordPress integration: forms, sync and SSO options. Micronetbd runs both as part of Salesforce admin as a service and the Salesforce practice.
Conclusion
By following these steps, you’ve successfully integrated WordPress with Salesforce’s Account Engagement using SSO. This setup not only simplifies user authentication but also leverages the powerful personalization and automation capabilities of Pardot right on your WordPress site.
Feel free to leave any questions or share your unique use cases in the comments below!
Need this built? Micronetbd implements Salesforce, Pardot and WordPress integrations and runs outsourced Salesforce administration for companies that would rather not hire for it. Book a working session.